This past summer I was asked to make some bean bags for my church's pre-school classes. I had fabric left over from super hero capes I had made for the classes as well. Anyway, I thought I'd show you how I did it. It really wasn't very hard, just straight stitches, but it was a lot of steps!
I started by cutting my fabric into 4x8 rectangles. I planned on making 20 of each color (red and blue) so I cut out 40 rectangles to make the bags double layered so they were a little sturdier. Next I folded them all in half and ironed the fold. Next, pin the side opposite the fold and sew two sides of the square starting from a corner of the folded side. When you get to the corner leave the needle in the fabric, lift the foot and turn the fabric 90 degrees to do the next side. This will give you nice crisp perfect corners. Make sure to back stitch when you get to the end and trim the thread.


Next, you'll need to turn it inside out. But first depending on how much excess you have on your edges you may need to trim the corners with a diagonal cut to help them lay flat once it's turned inside out. You can just barely see I had to do that to the top corner in the picture above. Since it's double layered it might be hard to get the corner to turn inside out well. I used a flat head screw driver to gently push the corner out.

Again, get the iron out and iron the squares to get the edges nice and flat.
Next, put almost 1/4 cup of lentils inside.


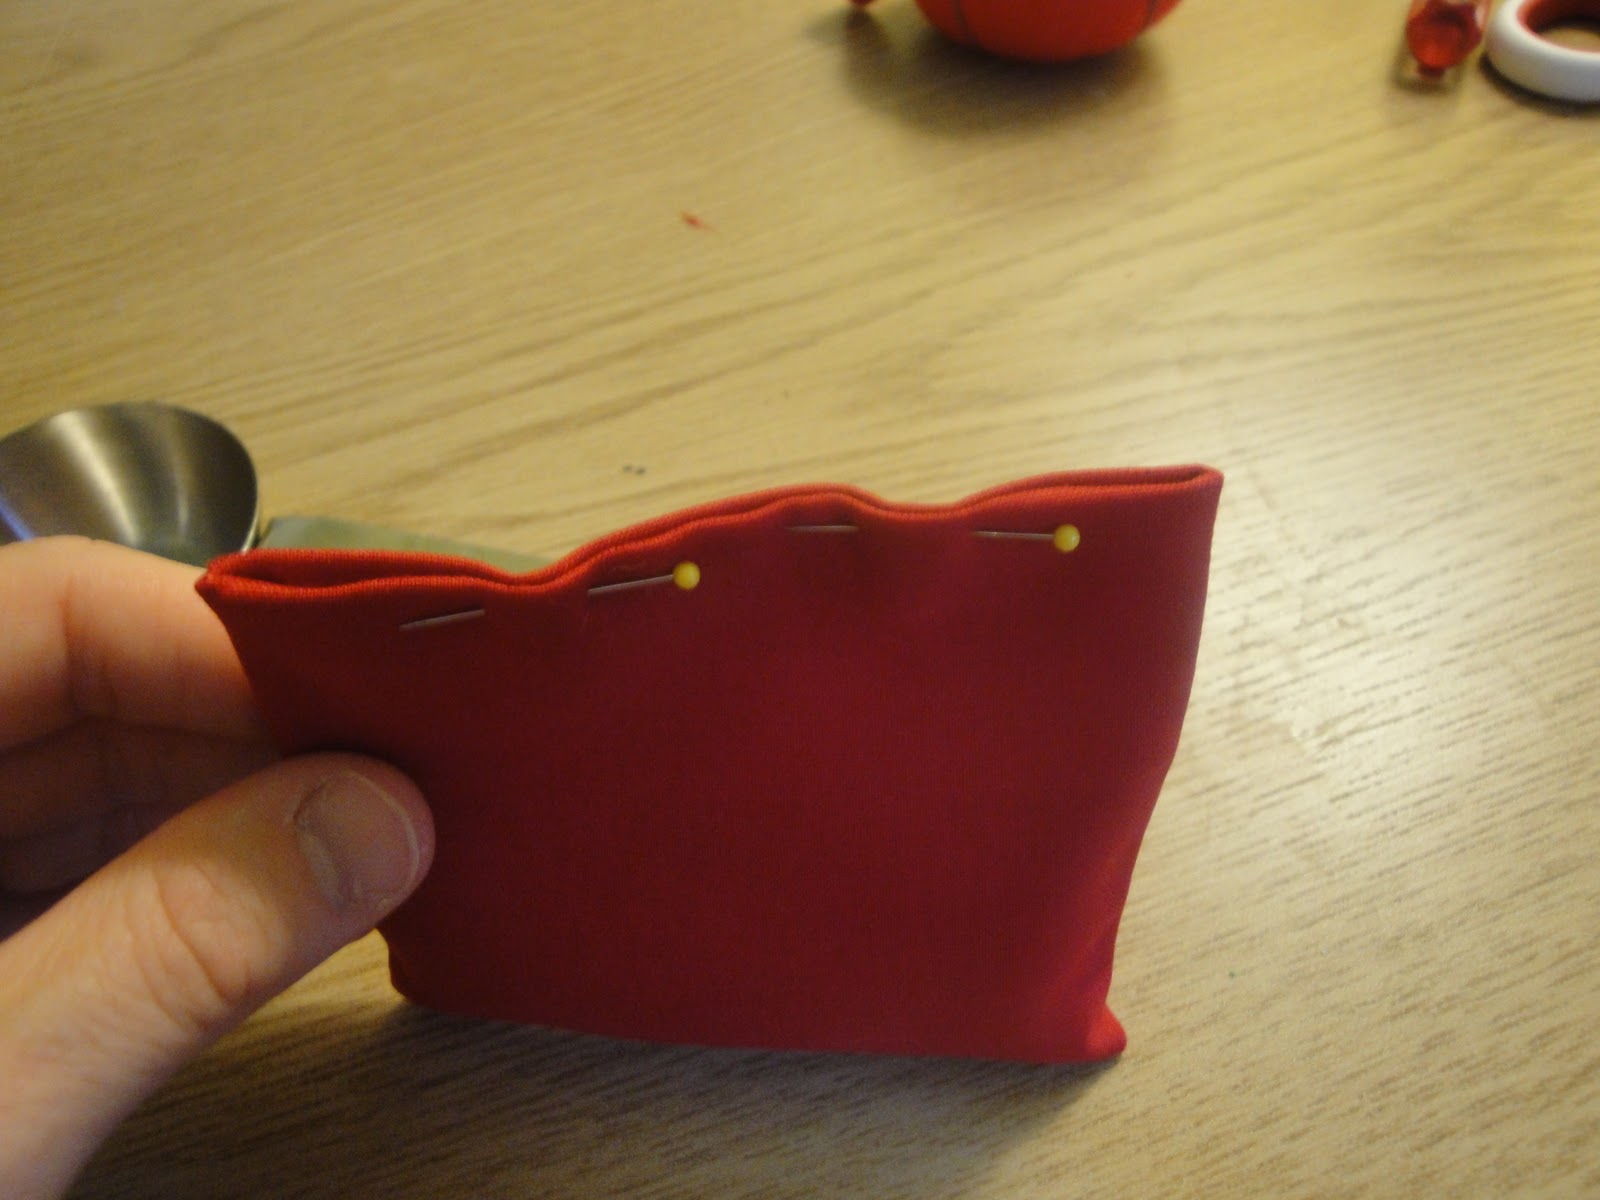
After you've poured the lentils in the bean bag you'll need to fold in the top edges to close the bag neatly. This was probably the hardest part of the project. You'll want to fold the edges, iron them and then pin them together.


 When the Fray Check dries, trim your threads and voila, you're done! Enjoy!

I started by cutting my fabric into 4x8 rectangles. I planned on making 20 of each color (red and blue) so I cut out 40 rectangles to make the bags double layered so they were a little sturdier. Next I folded them all in half and ironed the fold. Next, pin the side opposite the fold and sew two sides of the square starting from a corner of the folded side. When you get to the corner leave the needle in the fabric, lift the foot and turn the fabric 90 degrees to do the next side. This will give you nice crisp perfect corners. Make sure to back stitch when you get to the end and trim the thread.

It'll look like this after you sew it:


Next, put almost 1/4 cup of lentils inside.


After you've poured the lentils in the bean bag you'll need to fold in the top edges to close the bag neatly. This was probably the hardest part of the project. You'll want to fold the edges, iron them and then pin them together.


After you have ironed and pinned the open end you can now sew it closed! I started at a corner opposite the opening, that way if the stitch ever comes undone, then lentils won't fall out. :) Remember to leave the needle in, lift the foot and turn the bean bag at the corners. You'll have to continually push the lentils to the opposite side of the needle so that none are in the way and all of them get in the bag. After stitching around all four sides, back stitch a little and then use some Fray Check to seal the stitches. You can buy Frey Check anywhere they sell fabric. (It is the best!!)


Comments
Post a Comment